最近參加了彼得潘的iOS App程式設計入門,此篇將會利用Firebase Database串接Swift來打造訂飲料App,如果對Swift開發有興趣的朋友,推薦參加Peter的課程唷!
此次的相關代碼放置於:https://github.com/hsuanchi/Swift_Demo/tree/master/orderAppExample
Table
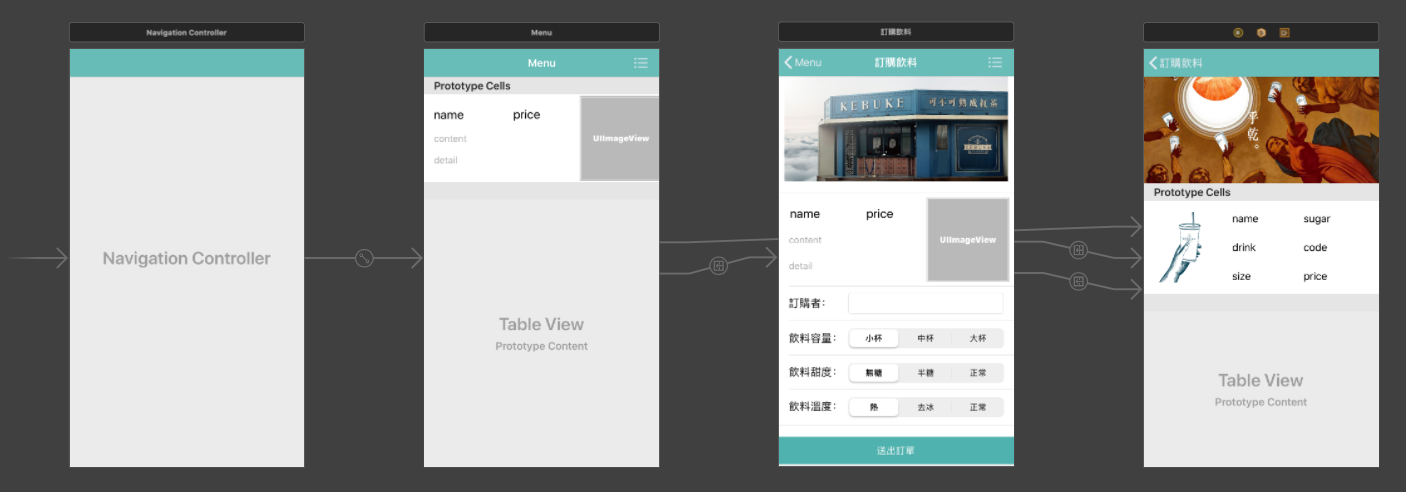
一. 最終App畫面:
二. 架構:
可以分成三個Scene,分別是Menu、訂購飲料和訂單資料
- Menu Scene
- ViewController
- MenuListTableViewCell
- 訂購飲料 Scene
- OrderMaxTableViewController
- 訂單資料 Scene
- ShowOrderTableViewController
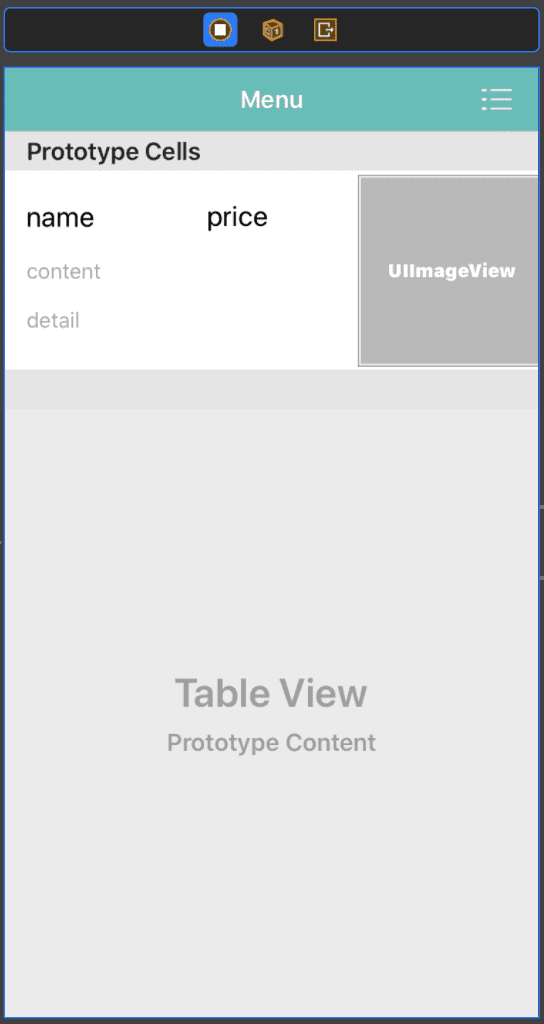
頁面一:Menu Scene
1.首先用struct來定義Menu頁內清單的型別
|
1 2 3 4 5 6 7 |
struct DrinkData { var image: String? var name: String? var price: String? var content: String? var eng_content: String? } |
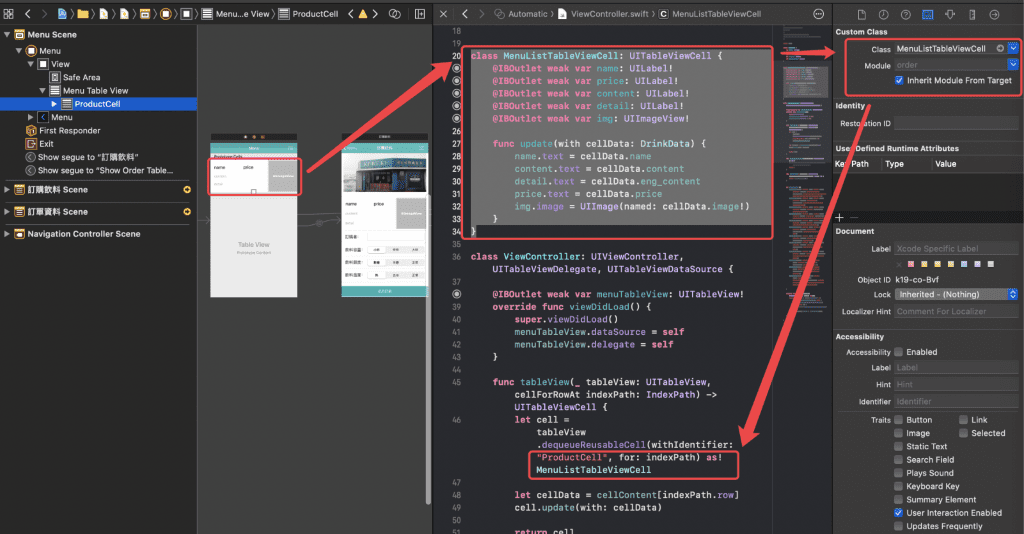
2.因為UIViewController中無法拉Label,所以建立UITableViewCell來針對介面中的Label設定Outlet,並寫了update func來更新表單中的資料,詳細設定如下:
|
1 2 3 4 5 6 7 8 9 10 11 12 13 14 15 |
class MenuListTableViewCell: UITableViewCell { @IBOutlet weak var name: UILabel! @IBOutlet weak var price: UILabel! @IBOutlet weak var content: UILabel! @IBOutlet weak var detail: UILabel! @IBOutlet weak var img: UIImageView! func update(with cellData: DrinkData) { name.text = cellData.name content.text = cellData.content detail.text = cellData.eng_content price.text = cellData.price img.image = UIImage(named: cellData.image!) } } |
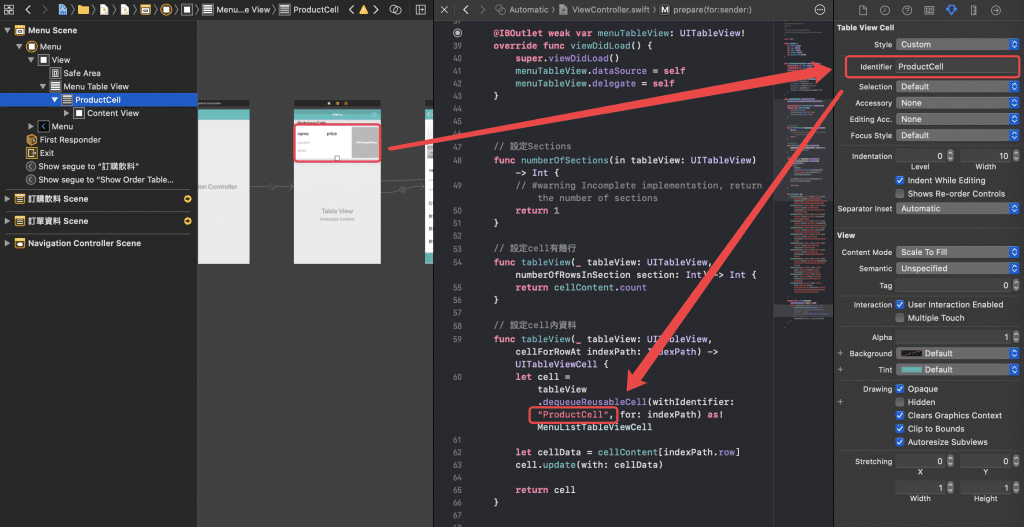
3.設定UIViewController內Sections和Cell行數,以及Cell要傳入的資料
|
1 2 3 4 5 6 7 8 9 10 11 12 13 14 15 16 17 18 19 20 |
// 設定Sections func numberOfSections(in tableView: UITableView) -> Int { // #warning Incomplete implementation, return the number of sections return 1 } // 設定cell有幾行 func tableView(_ tableView: UITableView, numberOfRowsInSection section: Int) -> Int { return cellContent.count } // 設定cell內資料 func tableView(_ tableView: UITableView, cellForRowAt indexPath: IndexPath) -> UITableViewCell { let cell = tableView.dequeueReusableCell(withIdentifier: "ProductCell", for: indexPath) as! MenuListTableViewCell let cellData = cellContent[indexPath.row] cell.update(with: cellData) return cell } |
4.最後用prepare將所選到的cell資料傳遞到下個頁面
|
1 2 3 4 5 |
override func prepare(for segue: UIStoryboardSegue, sender: Any?) { if let controller = segue.destination as? OrderMaxTableViewController, let _ = menuTableView.indexPathForSelectedRow?.section, let row = menuTableView.indexPathForSelectedRow?.row { controller.cellData = cellContent[row] } } |
頁面二:訂購飲料 Scene
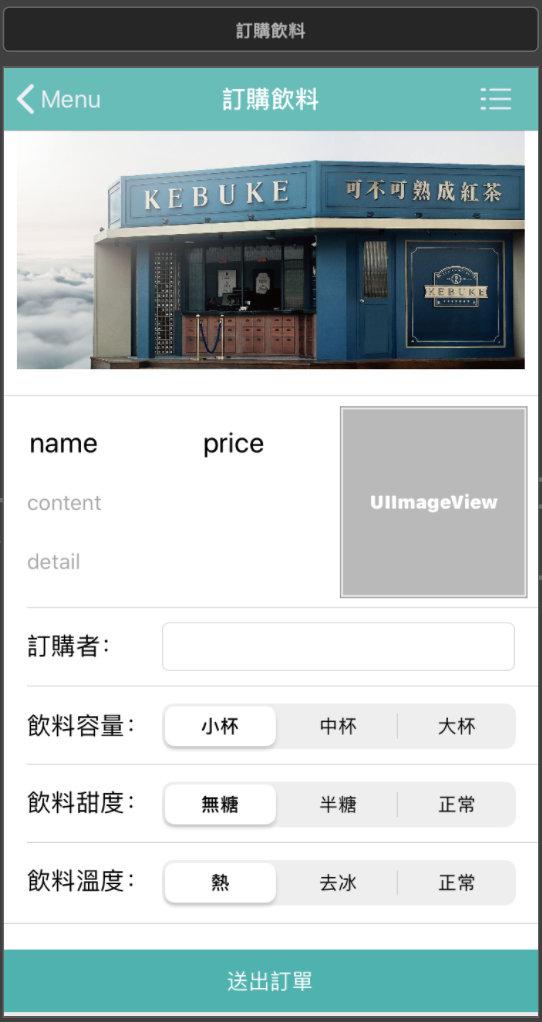
1.利用setCellData(with: cellData!)來接收上一頁傳遞來的資料,並用cellData.名稱來取得細項
|
1 2 3 4 5 6 7 8 9 10 11 12 13 14 |
var cellData: DrinkData? override func viewDidLoad() { super.viewDidLoad() setCellData(with: cellData!) } func setCellData(with cellData: DrinkData) { nameLabel.text = cellData.name priceLabel.text = cellData.price contentLabel.text = cellData.content detailLabel.text = cellData.eng_content imgLabel.image = UIImage(named: cellData.image!) } |
2.當使用者點擊送出訂單按鈕時,先判斷是否都有填入資料,如果判斷成功將會把資料送到Firebase Database,然後再利用self.performSegue(withIdentifier: “sendOrderDB”, sender: nil)來將畫面跳轉至下一個頁面
|
1 2 3 4 5 6 7 8 9 10 11 12 13 14 15 16 17 18 19 20 |
@IBAction func orderSend(_ sender: Any) { if orderNameLabel.text == ""{ print("[name] == empty") }else{ db.collection("orders").addDocument(data: [ "name": orderNameLabel.text ?? "", "drink": nameLabel.text ?? "", "price": priceLabel.text ?? "", "size": orderSizeLabel.titleForSegment( at: orderSizeLabel.selectedSegmentIndex) ?? "", "sugar": orderSugerLabel.titleForSegment( at: orderSugerLabel.selectedSegmentIndex) ?? "", "code": orderCodeLabel.titleForSegment( at: orderCodeLabel.selectedSegmentIndex) ?? "" ]) { (error) in if let error = error { print(error) } } self.performSegue(withIdentifier: "sendOrderDB", sender: nil) } } |
頁面三:訂單資料 Scene
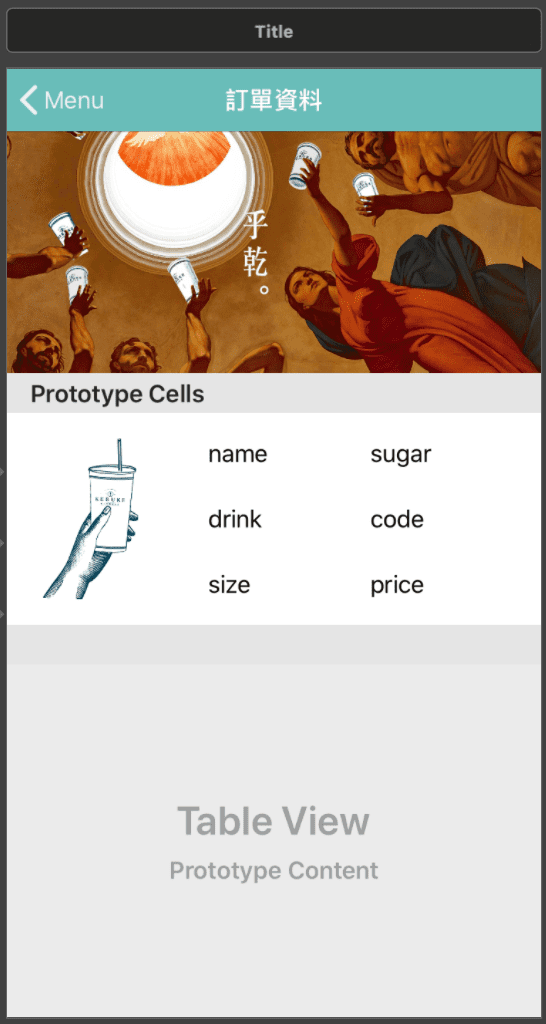
1.從Firebase中撈取過去下單資料,並append進list中,再撈完資料後利用DispatchQueue.main.async{self.tableView.reloadData()}來讓tableView reload,這樣就可以顯示出所有訂單的資料囉!
|
1 2 3 4 5 6 7 8 9 10 11 12 13 14 15 16 17 18 19 20 21 22 23 24 25 26 27 28 |
var documentId:[String] = [] var nameList:[String] = [] var drinkList:[String] = [] var sizeList:[String] = [] var sugarList:[String] = [] var codeList:[String] = [] var priceList:[String] = [] func readData(){ db.collection("orders").getDocuments { (querySnapshot, error) in if let querySnapshot = querySnapshot { for document in querySnapshot.documents { self.documentId.append(document.documentID) self.nameList.append(document.data()["name"] as! String) self.drinkList.append(document.data()["drink"] as! String) self.sizeList.append(document.data()["size"] as! String) self.sugarList.append(document.data()["sugar"] as! String) self.codeList.append(document.data()["code"] as! String) self.priceList.append(document.data()["price"] as! String) } } DispatchQueue.main.async { self.tableView.reloadData() } } } |
2.讓使用者點擊cell後,可以移除此筆訂單;可以看到alert這邊是在定義待會跳出來的視窗畫面,而addAction裡面刪除db資料庫資料和刪除List 內資料,是在使用者按下確認後開始進行的動作
|
1 2 3 4 5 6 7 8 9 10 11 12 13 14 15 16 17 18 19 20 21 22 23 24 25 26 27 28 29 30 |
// 點選 cell 後執行的動作 override func tableView(_ tableView: UITableView, didSelectRowAt indexPath: IndexPath) { let alert = UIAlertController(title: "取消此筆訂單", message: "", preferredStyle: .alert) alert.addAction(UIAlertAction(title: "再考慮一下", style: .cancel, handler: nil)) alert.addAction(UIAlertAction(title: "確定取消 ", style: .default, handler: { _ in let id = self.documentId[indexPath.row] // 刪除資料庫內資料 self.db.collection("orders").document(id).delete() { err in if let err = err { print("Error removing document: \(err)") } else { print("Document successfully removed!") } } // 刪除 List 內資料 self.documentId.remove(at: indexPath.row) self.nameList.remove(at: indexPath.row) self.drinkList.remove(at: indexPath.row) self.sizeList.remove(at: indexPath.row) self.sugarList.remove(at: indexPath.row) self.codeList.remove(at: indexPath.row) self.priceList.remove(at: indexPath.row) self.showTableview.deleteRows(at: [indexPath], with: .automatic) })) self.present(alert, animated: true, completion: nil) } |
相關延伸閱讀:
- [Swift 教學] 彼得潘的iOS App課程作業五連發
- [Swift 教學] iOS APP如何串接API
- [Swift 教學] Swift Firebase資料庫串接 (附程式碼)
- [Swift 教學] Swift example 訂飲料App (附程式碼)
[Swift 教學] Swift 訂飲料App 結束囉,感謝收看,有關Max行銷誌的最新文章,都會發佈在Max的Facebook粉絲專頁,如果想看最新更新,還請您按讚或是追蹤唷!